Coming into 2015 we were looking at running classes on Spadone, and we needed a simple affordable simulator that students could train with. Whilst we could have used wooden batons, the ability to them in antagonistic drills would be limited. Enter the humble shinai which with a little bit of work can be turned into an acceptable simulator suitable for antagonistic drills.
Materials
Shinai blank – size 39 is best for making a spadone
5/16″ threaded rod, ~50 cm in length
2 x 5/16″ washers
4 x 5/16″ nuts
2 x 5/15″ dome nuts
30 mm ID PVC tubing, ~70 cm (test it in the hardware store – it should be a snug fit with the shinai handle)
30 mm dia dowel, ~ 40 cm – this should be a close fit to the internal diameter of the PVC tube
34 mm rubber stopper
adhesive backed foam (weather strip)
tape (I’ve used ice hockey tape for it’s robustess)

Construction
These instructions are for making a spadone of 150 cm length. The actual construction process takes about an hour.
1. Mark the shinai at 100 cm from the tip. This will be the position of our cross guard.

2. Insert the handle into the PVC tube, and then mark the points 100 cm and 150 cm from the tip. Remove the PVC tube and cut to size.
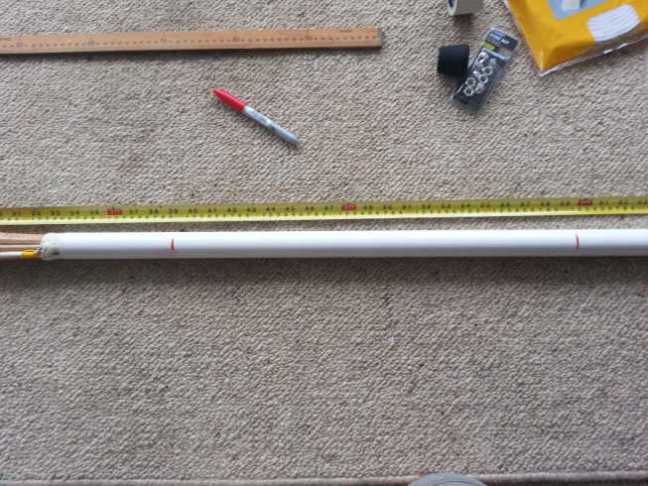
3. Wrap the handle with tape at the marked cross guard point and at the end of the handle, so that it fits snugly into the PVC tube without rattling.
4. Reinsert the shinai into the PVC tube, and drill the hole to accept the threaded rod for the cross guard. Ensure that this hole is in line with the Tsuru string on the back edge, so that it is aligned with the true and false edges.
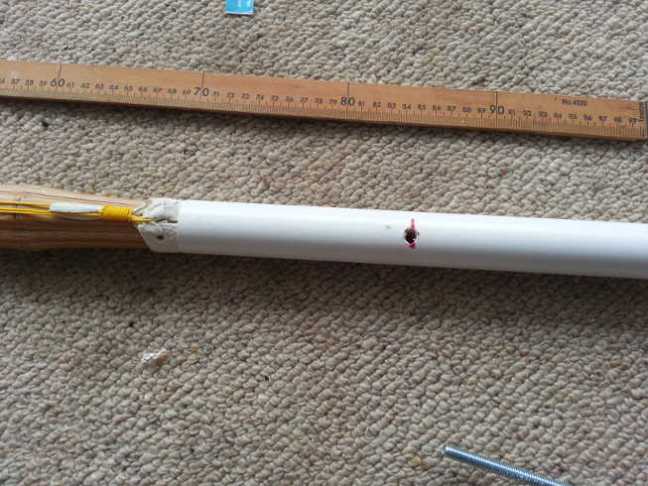
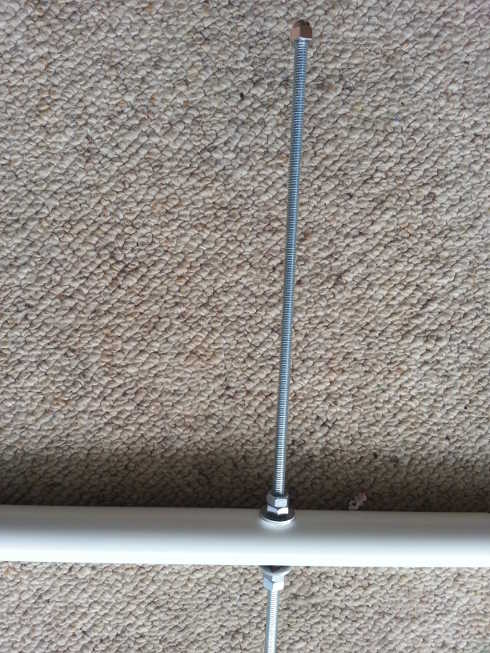
5. Insert the threaded rod, and secure with the washers and nuts. Use two nuts on each side to ensure the rod doesn’t work loose. Cap each end with a domed nut.
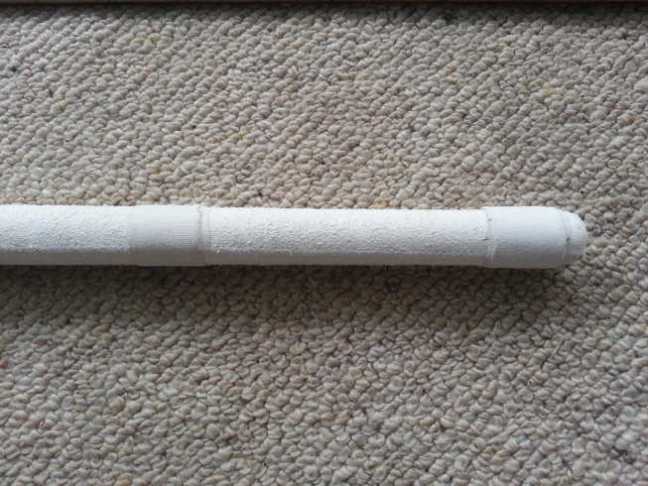
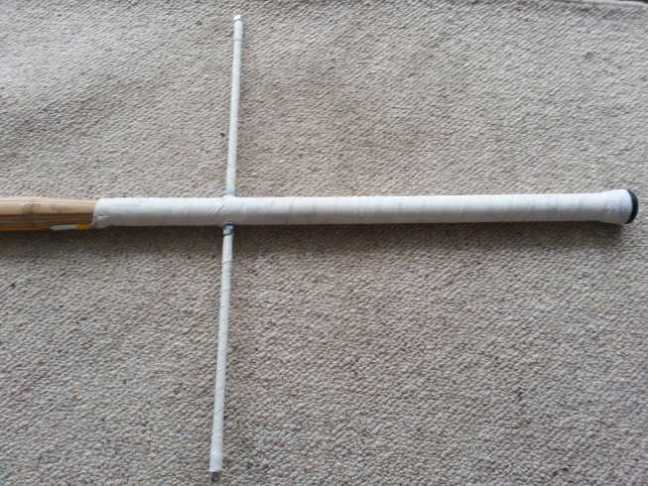
6. Measure and cut the wooden dowel to fill the PVC tube. Insert the dowel and secure with a strip of tape around the dowel to ensure a snug fit.
(It’s still sticking out a little bit in this photo as I was just about to apply the tape before pushing it in fully.)
The wooden dowel is to strengthen the bottom end of the PVC tubing handle.

7. Spiral wrap the adhesive backed foam along the cross guard ends between the nuts and dome nuts. This foam will help prevent damage to the opponent’s shinai during use.
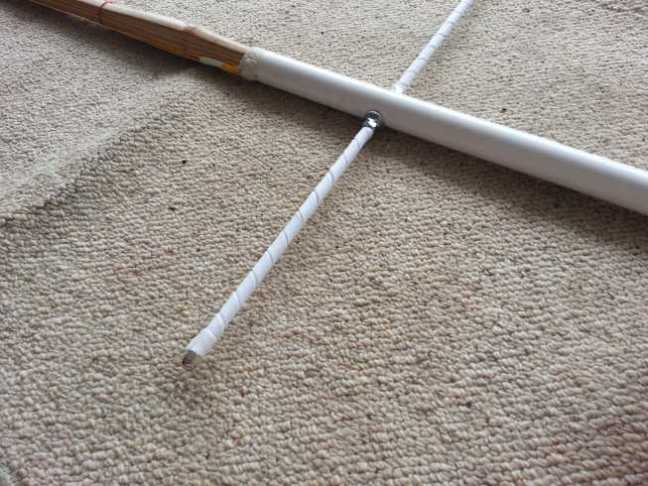
8. Spiral wrap with tape over the foam in the opposite direction to the one used for the foam wrapping. This will prevent the foam from unravelling and coming off during use.Secure the ends with a little strip of tape to lock it in place.
9. Push the rubber stopper on the end of the handle and then tape it in place and spiral wrap down the handle. Your spadone is now complete.

Notes
All the parts cost about $20 from Bunnings, with the exception of the 30 mm wooden dowel which only comes in lengths of 1.8 m (~$30) or greater. Shorter lengths (90 cm) of 25 mm dowel can be purchased for less than $10 and padded out with some of the surplus adhesive padding to make a snug fit as an alternative. If you use the cheaper option you could do the whole spadone for about $70 – $80 outlay, depending on the cost of your shinai blank.
The threaded rod comes in a 60 cm length, which I think is a bit too long. I should probably have cut it back to 40 cm first. I’ve since done so and found it to work much better!
